Showing posts with label Projects. Show all posts

Tuesday, April 23, 2013

Tutorial - DIY Aztec Print Tote Bag


It appears Aztec and Navajo prints are going to stick around for awhile - which is plenty fine by me, I love their sharp geometrical angles, especially when paired with bright punchy colours. 

As the trend continues to grow, moving from fashion to home goods, accessories, and even manicures, I decided it was time I had a little Aztec in my life. I decided to incorporate the print into a DIY project, preferring to stay away from the shops to save my pennies for travel, utilizing a stencil to keep the edges crisp and straight. 

To make one of your very own, here are the materials you'll need:
  • Transparent paper (to make the stencil)
  • Thin tip permanent marker
  • Exacto knife
  • Any pattern, print, or silhouette 
  • Scotch tape
  • Acrylic paint
  • Sponge paint brushes
  • Canvas tote bag
  • Cardboard
  • Plastic plate

To start, we need to make the stencil for our pattern. Although I chose to go with an Aztec print, the options really are endless and I've got a few more ideas in the works that I hope to try soon. I found a print I liked online and printed it out, scaled to fit on an 8x11 piece of paper. With some decent ruler skills you could also draw up your own pattern on some grid paper. 

Stencil materials - I used a pop flat to cut on but a cutting mat would be much better


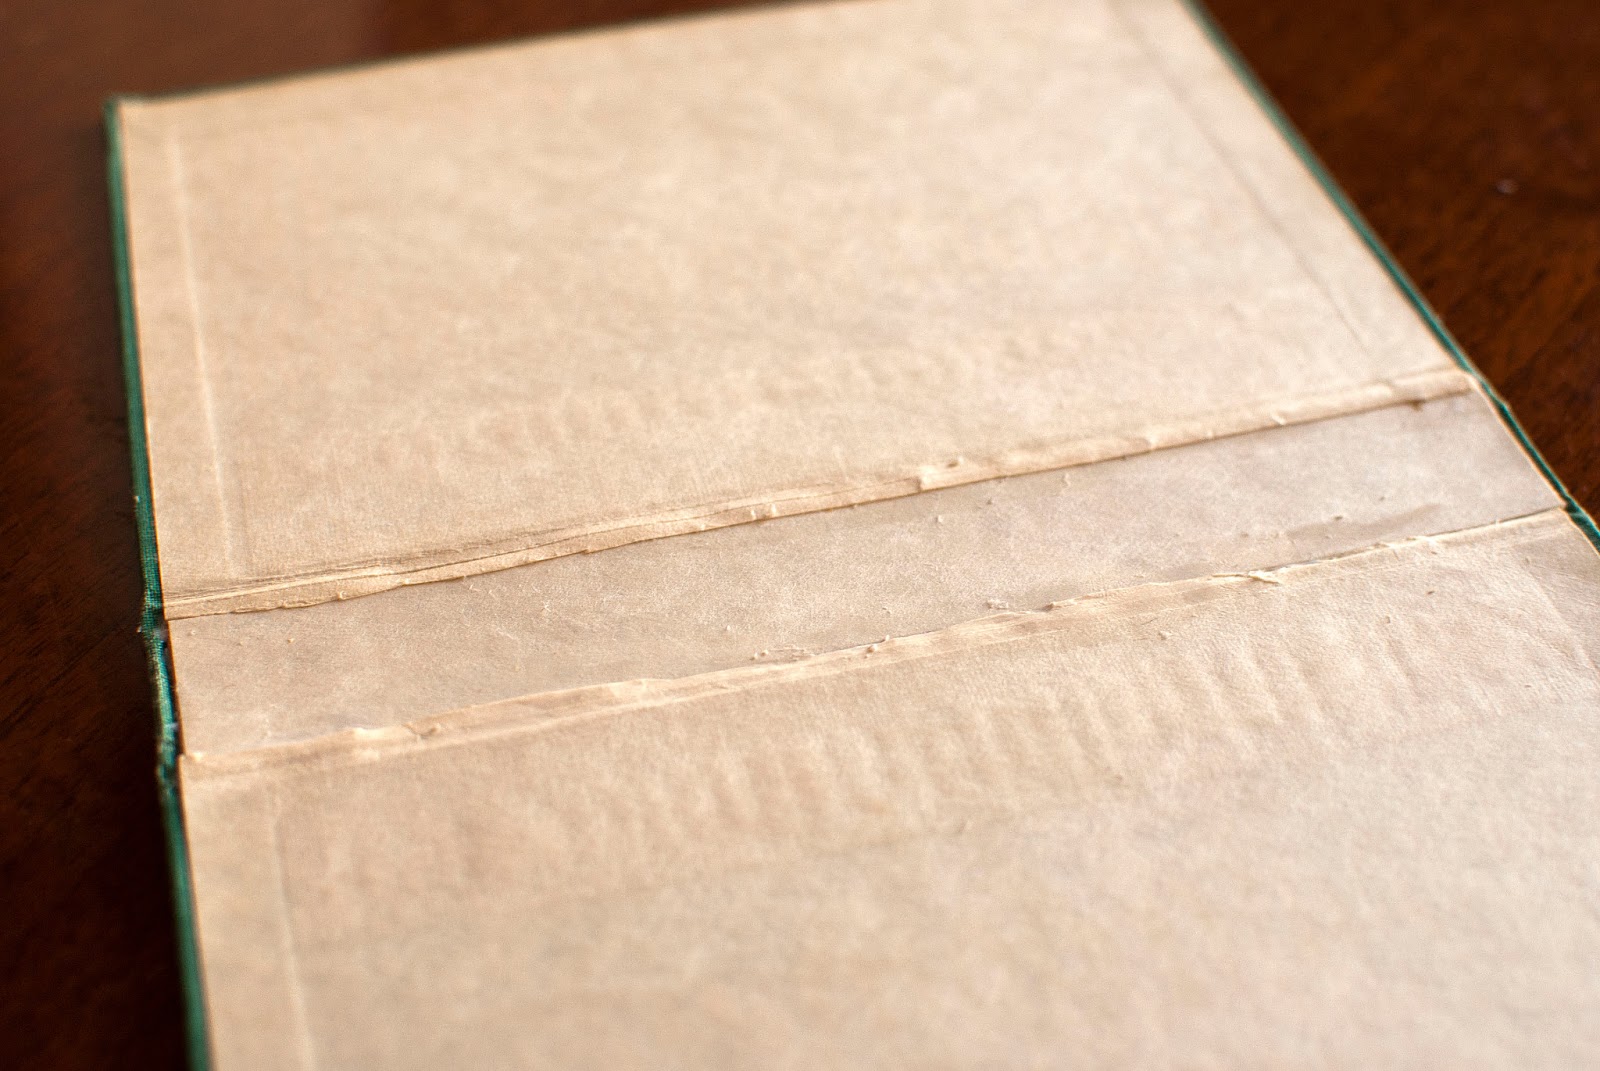
The transparent folders I bought from Staples called Poly Project Pockets worked great

Taking the pattern, attach it to your transparent paper and trace over the pattern with your marker. I found transparent folders that had a good thickness - thin enough to cut through but thick enough to hold up - a five pack was on sale for $6, and I was able to cut them open, doubling what I have to work with (cutting my cost/stencil to 0.60 cents) . 

The transparent paper after tracing my pattern

Cutting open the folder

Once the pattern is transferred, remove the original paper copy and then, working on a piece of cardboard to protect your table, carefully cut out the pattern using your exacto knife. 

Cutting out the pattern is tedious but you want to do a good job to ensure you get a quality stencil

Now that the stencil is created, we can move onto painting - the fun part!

Slide a piece of cardboard into the tote bag to prevent any paint from bleeding through and place a small amount of paint onto the plastic plate. Layout your stencil and secure it to the canvas with the Scotch tape.

My canvas tote bag was a bit wrinkled so I ironed it first to ensure it would lay flat. 

Lay out the stencil and secure it with tape


Using one colour at a time, apply the paint with the sponge brush in a dabbing motion. To avoid bleeding, keep the brush vertical, dabbing up and down, and only apply a small amount of paint to the brush at one time.

I found it was also helpful to tape off the sections of the stencil I didn't want to paint - because my stencil was more on the intricate side with small gaps between the shapes, I didn't want to accidentally "spill" paint over the edges of the stencil.

You can see the tape covering sections of the stencil to avoid accidents

Apply the paint one colour at a time, letting it dry in between

Between colours it's a good idea to allow the paint to dry for 5-10 minutes - remove the stencil to avoid any smudging.   

Once the pattern is complete let the entire bag dry overnight before putting it to use. As far as cleanup is concerned, it was a breeze. I simply peeled the tape off the stencil and wiped it down with a damp paper towel so I can use it again and washed out my foam brushes.

Once the painting is done remove the stencil and let it dry

I tried to think ahead when applying the paint to avoid having too much of one colour in a single area

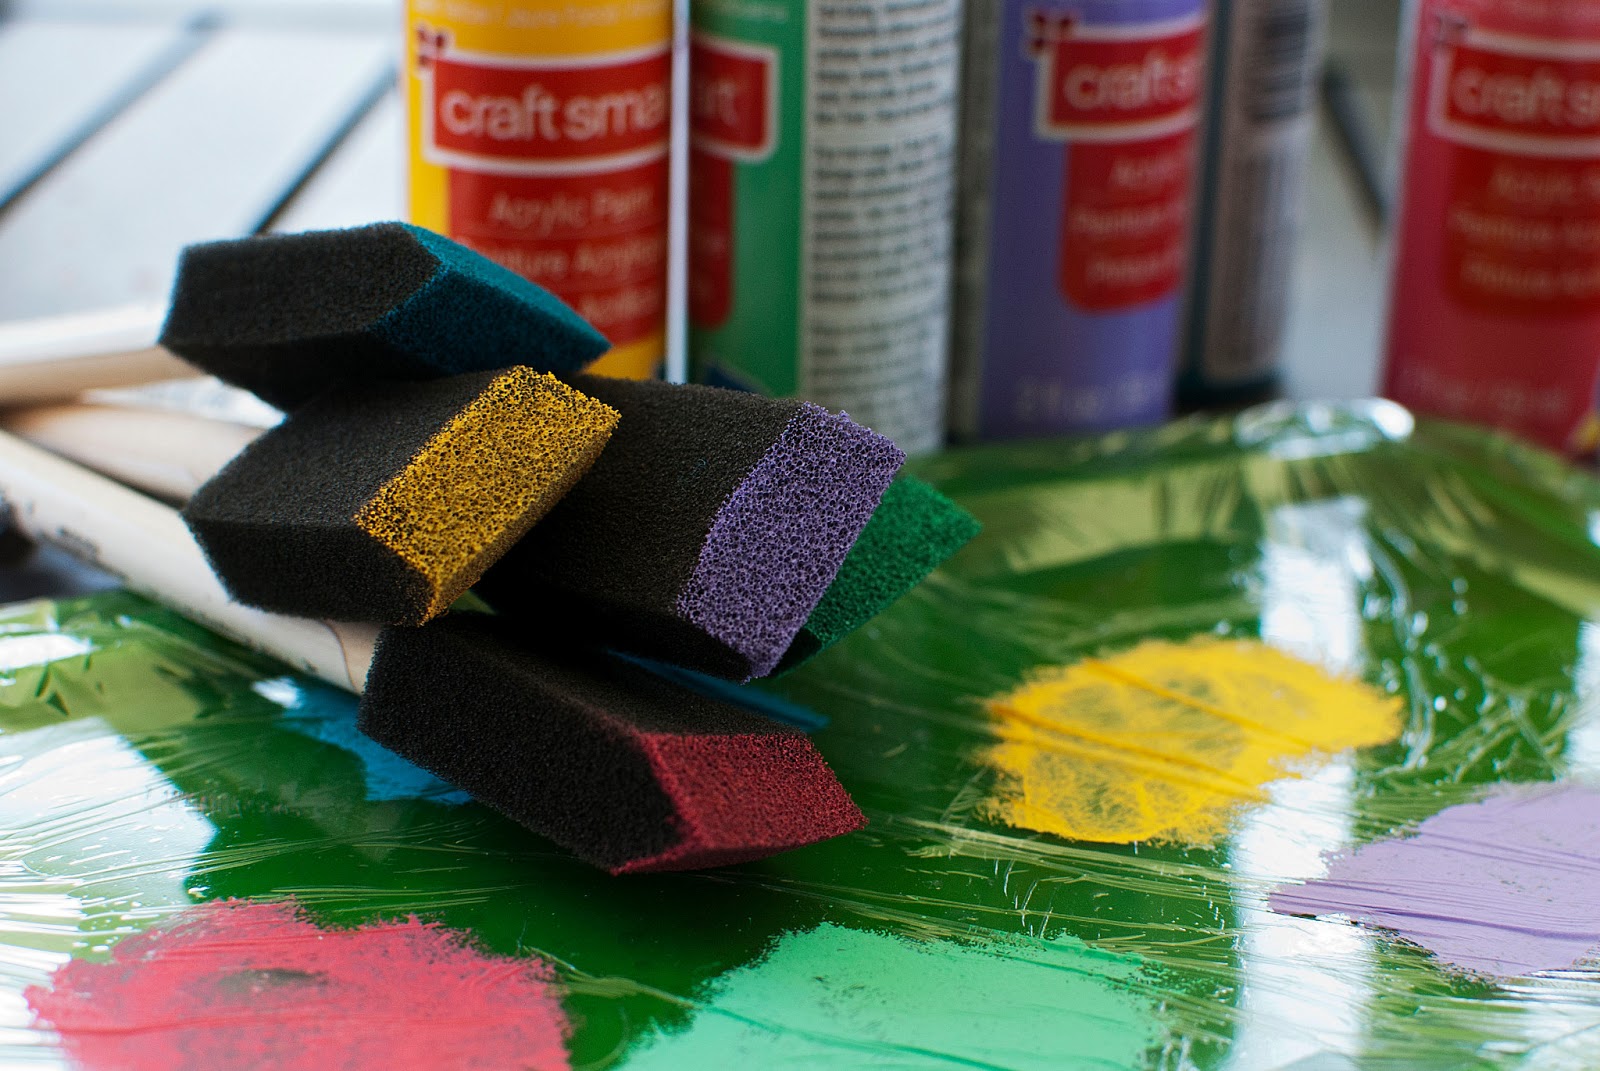
This craft smart paint is from Michaels - I used Dark Yellow, Spearmint, Turquoise, Grape Taffy, and Hot Pink

I'm extremely happy with how my tote bag turned out, the colours are perfect for summer and the lines are quite crisp with very little bleeding. The project took about 6 hours total, which depends significantly on the complexity of your stencil. Initially I thought this tote would be the perfect size to hold my knitting projects; however, now I think it's too cute to keep stored away at home. 

The finished product!

Thursday, February 21, 2013

1 Hour DIY - Vintage Book E-Reader Case Tutorial

Taking a break from baking and knitting (I haven't done much but for the past month), I found inspiration for a functional and cute DIY at my local thrift store and whipped up this case for my Kindle e-reader in under an hour. 

My 1 hour DIY e-reader cover

Last year I inherited some beautiful vintage hardcover books from my grandfather - many with lovely scrolled messages in the front cover dating back to the 1940s - and I've been smitten ever since. Since the books hold special meaning, as a reminder of my wonderful and well-read grandfather, I display them proudly in my bookshelves and adore the character they add amongst my new editions and hit up my local thrift store when I need something I can cut-up, stamp, paint, or glitter...

After walking around with this little case in my purse it's held up well and has done a great job protecting my e-reader. For a pricier or more delicate item - tablet or ipad - I would be inclined to add some fabric wrapped padding to the inside cover to add a little more cushioning and protect the screen. 


Materials: 
Scissors, ruler, pencil
Elastic tape (mine was 10mm in thickness)
Cardboard, both thin and corrugated (I used a piece of notepad backing and the lid from a shoe box)
Glue, white and hot glue/glue gun (I used Aleenes Tacky Glue and a toothpick to apply it)
1 hardcover book

*A note about buying the perfect book - Bring your reader/tablet/ipad with you to measure in store and choose a book that is only slightly bigger than your electronics. You'll also want to pay attention to the width, I realized the book actually becomes wider once the inner pages are removed so try and select a thin book if you can find one. In the end my book was about an inch thick in the store and I had room to include my charger cord inside the front cover. 

Steps: 
Remove the book pages from the hardcover. I initially tried using a knife to gently slice along the inside of the binding but it didn't work very well and I gave up and used my scissors which worked much better. 

Remove the book from the spine

Measure a piece of thin cardboard (notebook backing works well) to fit inside the now bare book spine. This is important because the spine portion of the cover isn't reinforced the way the front and back panels are and therefore is a bit wobbly. Before gluing the cardboard in place, cover it with a page from the book to give a clean, professional look.  Glue the cardboard down with basic white glue and let dry. 

Measure a piece of cardboard to fit the spine

Double check the size

Cover cardboard with a page from the book

Paste the cardboard into the spine of the book

Cut a piece of corrugated cardboard to fit inside the back cover - this is where I used the shoebox lid - and cover it with another page of the book. The front of my book included a wonderfully illustrated title page so I used it here to add a pretty little detail. 

Covered cardboard with a page from the book

Once dry, cut four pieces of elastic. To measure, wrap the elastic around the corner of the e-reader - mine were 3 inches each. Remember you want the elastic to be tight enough to hold your precious electronics securely and it will stretch. Using your hot glue gun, glue the elastic ends to the back to the corrugated cardboard (see below) so that it stretches over the front corners. 


Glue down the elastic on each corner

Test the elastic placement by sliding the e-reader into the cardboard piece, ensure the elastics are secure. 

Attach the corrugated cardboard/elastic piece to the back cover of the book using hot glue and press firmly until dry. 

Test the e-reader's fit in the elastics

Glue the cardboard backing down and you're done!

If you want to add a piece of elastic to hold your cables/cords, simply cut a small piece of elastic (mine was 2 1/2 inches) and hotglue the ends together to make a loop. Glue the loop to the front cover with the glue gun. Then coil the cords and slide them through the loop.

Make an elastic loop...

... and slide in your accessories


I also added a piece of elastic to keep the book closed while hanging out in my purse. To do so yourself, cut a piece of elastic to fit over the front cover (with the e-reader in place) and glue it vertically onto the back of the corrugated cardboard (where the elastic corners are secured) a half inch in from the the outside edge. Once dry you can slip the elastic over the top cover, and while reading flip the elastic over the back cover and out of sight. 

Elastic keeps the front cover closed

Voila, there you have it! And the best part, besides how adorable it is... this project only cost me five dollars for an old book and some elastic!


I absolutely love my e-reader, the convenience and portability is hard to beat. However I know many die hard readers who swear by the real deal and refuse to give up their paperbacks. Perhaps now, we can have the best of both worlds; after all, isn't our hate better reserved for those crazy social outcasts who don't read at all?


This post has been shared over at:
Yesterday On Tuesday 
The Shabby Creek Cottage 
Somewhat Simple
Beyond the Picket Fence 
Rae Gun Ramblings

Monday, February 4, 2013

Typography, Quotes, and DIY Art

"Because even the smallest of words can be the ones to hurt you, or save you." 
                                                                           - Natsuki Takaya                                   

When it comes to filling my home I want every piece to be special. Whether simply beautiful, full of sentimental value, or capable of eliciting emotion, each piece builds on the other to generate a specific mood in the room. Art is a great way to add this personalized touch to a room and as it doesn't need to serve a functional purpose, it's only purpose is to represent you. 

Art can also be pricey, and as we've established that it's purely decorative it can be hard to lay down your hard earned cash for something that simply hangs on the wall. Luckily, it's quite easy to whip up something personalized yourself for a fraction of the cost - photographs, children's drawings, sketches, and paintings - and now with the help of Photoshop you can create professional looking posters. 

Inspiration-a-plenty can be found everywhere, with Etsy and Pinterest being my go to resources, and after a casual glance my gears started turning...

(via)
(via)

Blame it on the proximity to Valentine's Day, or just the fact I'm a hopeless romantic, but I immediately knew the beautiful prose of F. Scott Fitzgerald would marry perfectly with these graphic, modern, typography posters. Unfortunately, nailing down just which line to use from his many beautiful stories was easier said than done. After finally settling on a couple, I played around with different fonts, textures, and layers in Photoshop for quite some time, becoming lost in my experiments.


Using Photoshop and this simple tutorial I was able to create these typography posters of my own in a few short hours. The best part is that they are absolutely free to make, and the perfect rainy (or snowy) day activity, and therefore easy to interchange whenever I want to try something new. 

I'm planning to print them on a good quality paper and frame them in crisp white frames, once of course we're settled in a place of our own and have some wall space for them. 

Thursday, January 31, 2013

Five Minute Bunting Birthday Card


Scrap fabric, ribbon, and glue - the 5 minute bunting card was born


After whipping up an incredible cake for my mom's birthday, gift wrapping and buying a card were pushed to the last minute; in the end gift wrapping didn't happen, sorry mom!

Without a card, I needed to come up with a DIY version quick and turned to one of the most adorable trends plastered all over the internet right now - bunting. 


My Inspiration...

Festive birthday cake (via)

Cute little necklace (via)

Birthday invites - love the bright hues! (via)


This card was not only incredibly easy to make, it also didn't require any special materials and was ready in less than five minutes (plus some drying time for the glue). It's also amazingly cute if you ask me. 

Easy yet effective, there's nothing better for Birthdays than bunting

Using some basic card stock, folded in half (hamburger style - remember learning hotdog and hamburger style?) I sketched the bunting first with a pencil and cut the little flags from scrap fabric and ribbon. After laying everything out to ensure it looked nice, I went over the pencil with permanent marker and then glued my flags down. A few minutes of drying time later, the card was complete! 

Free, easy, and cute - so much better then spending five dollars at a card store!


Monday, June 11, 2012

A Gift with Meaning

Last week a group of girlfriends and I gifted a gorgeous planter to a friend mourning the loss of someone very special. Instead of each gifting a small bouquet or card we decided to get a more meaningful gift and I think what we landed on may just be the best gift I've ever had the pleasure to give.

This ain't your momma's plain-jane flower planter. 


I'm only just learning that flowers have traditional meanings and there are dictionaries in-print and online that hold all this glorious information. We asked our friend for some words to describe the person she lost and then, using the book The Language of Flowers by Vanessa Diffenbaugh as a guide, we were able to select flowers for the planter that represent this beloved person. 

To share the flower names and meanings we made up a small laminated card - one side gave the definitions and the other side held a note expressing our sympathies. We tied this to the handle of a small wooden trowel nestled in with the plants. It turned out beautifully. 

Here are the flowers we ended up choosing:

Alyssum - Worth Beyond Beauty
Calla Lily - Modesty
Clover - Think of Me
Dahlia - Dignity
Fuchsia - Humble Love
Geranium - True Friendship
Gerber Daisy - Cheerfulness
Heliotrope - Devoted Affection

I am really excited about using these flower definitions to add meaning to a more generic gift - here are a few other ways I'd personalize a gift for someone special, or for myself.

Mother's Day/Birthday/Graduation: Give a bouquet of flowers selected specifically for their meaning. The flowers could represent the person receiving the gift (selfless, caring, genuine) or your hopes for the person (adventure, success, achievement). Share each flowers' meaning, and why you chose it, in a lovely card. 

Housewarming: Select flowers that represent what you hope this new home will mean to the new homeowners (warm, welcoming, love, family...). Add a few small garden steaks to mark each plant. I'd try to find, or make, some plant markers with the flower name on one side and the definition on the other - by the way there are some amazingly creative options to peruse on Etsy

Wedding Bouquet & Boutineer: I adore the idea of selecting flowers for your wedding that hold special meaning. Have the flowers in the bouquet represents what the groom means to her (and vice versa for his boutineer) or select flowers together than represent your future and use them throughout the wedding ceremony and reception. 

At Home: Sometimes you get back what you put out there. If you're buying plants or flowers for your home why not choose something that represents what you want from life, something you feel is missing (companionship, peace, health, prosperity), or an area you want to focus on and develop (courage, balance, harmony).

Flower dictionaries are available online - A simple Google search returned plenty of results - and although I haven't had a chance to read The Language of Flowers (yet!), I've been told it is a beautiful story. 

Enjoy!
Calli

Tuesday, April 3, 2012

DIY Bead Charm Bracelet

I found this chunky chain-and-turquoise necklace on-sale one December while doing some Christmas shopping. After I brought it home, I wore it a handful of times and then it hung out on my jewellery board for months collecting dust.


There was just something about it as a necklace that wasn't working - it was too short, too chunky, the colour didn't quite go with anything I wore - but I still liked it and I wanted to wear it more. Then inspiration hit, after 6-8 months of staring at it hanging there while I fell asleep... I was going to deconstruct the thing and make it into a bracelet!


The whole thing was actually quite easy and made use of supplies I had on hand - I love when you don't have to purchase anything for a project. In addition to the necklace pieces, I used a pair of needle nose pliers, some lovely glass beads, stainless steel pins for beading, and some little wire cutters.

Twenty minutes later... voila! A charming little charm bracelet!


I really love the spectrum of colour - additionally one or two little charms sprinkled in would look great too!

Enjoy!
Calli

Sharing over at...
Skip to my lou 
Today's Creative Blog 
 

Monday, February 20, 2012

Infiniti Scarf Tutorial

If you've had an opportunity to read around the ol' blog here, there's a good chance you've heard me go off about one obsession or another. Mid-century furniture, chairs in need of re-upholstery, bags in a rainbow of colours, black and white photos, scarves...

That last one is new, at least newer than the rest. And Etsy is feeding my obsession. Honestly, if I'm caught hiding in the bushes outside the sewing room of one of their many talented scarf creators, drooling over printed fabrics, that site will be 78% to blame.

I may or may not have an entire pin-board of scarves - and a real-life closet of a dozen or so... but I find that nowadays, when I find a gorgeous new scarf online, I don't rush to see how much it is, or if they ship to Canada, because I know I really don't need it. And if I bought all the scarfs that I really really wanted my family would have to contemplate an intervention.

Think I'm being dramatic? Don't feel bad, it's been known to happen from time-to-time. Check out these posts I've written recently, here, here, and here. - Yes, 3 in a month and a half, this one makes 4. It's a sickness really...

Anyways, onto the tutorial...

On Saturday I was able to slip in a little thrift shopping. In addition to a great striped skirt (floor length for the summer) I found some beautiful gray plaid fabric. $3.99 for 2+ meters (80ish inches) - I knew immediately that I wanted to do something with it, my mind went to upholstery first, as always, but then it hit me, infinity scarf all the way!

*Note, I'd never made an infinity scarf before.

Step 1: Wash and dry the fabric. Iron if needed.
Even if your fabric isn't from a thrift store it's always a good idea to wash and dry it to save a lot of headaches later on. No one likes shrinkage.


Step 2: Cut the fabric to size.
The fabric was quite wide (52 centimeters, 20.5 inches) so I cut it in half length wise. That made the piece I was working with about 2 meters long (80 inches) and 27 centimeters (10 inches) wide.

Step 3: Sew
I folded the fabric in half lengthwise, good sides facing each other, and made a stitch along the raw edge. This left me with a long fabric tube.


 After turning the fabric good side out, I turned my attention to the ends.

Take one end of the scarf and turn the raw edge in on itself - like a hem. Stitch the end, be careful not to sew the end closed!


At this point, I put a twist in the scarf before stitching it all closed - it gives the scarf some extra oomph when worn. The easiest way I could find to do this, without enlisting a friend to help, was to hold the hemmed end under my chin, take the raw edge and twist it once, then place the ends together on a flat surface.


Next, place the raw end inside of the hemmed end. Stitch closed.

Step 4: Show off!
That's it, infinity scarf complete!


Well there you have it, a great scarf for less than $4 and 30 minutes.

Enjoy!
Calli

By the way, I'm sharing this tutorial over at...
Brassy Apple
Skip to my Lou 
Fun to Craft 
Today's Creative Blog 
Night Owl Crafting
Beyond the Picket Fence 

Monday, January 16, 2012

Photo Gallery DIY

When I was a kid the Sears Wish Book would come each year at Christmas. I would flip through it at least a hundred times, folding over the corners to mark my favorites, while I wrote my letter to Santa. It was all very exciting.

Unfortunately I can't get away with this anymore, being a grown-up and all... I also find that there isn't much that I want for Christmas anymore. So this year, when my Dad asked for my list, I had a couple surprises on there for him. Instead of asking for stuff, I asked for help hanging some curtains and installing a photo wall.

My Dad is incredibly handy, which is wonderfully handy for me. I've received homemade toys and a cedar chest from him in previous years however, I think my request this year may have been the most difficult to date. Let's just say I get my stubbornness, temper, and short fuse from my dad.

I've had my heart set on a photo ledge for a few months, since I have tons of photos which translate into a ton of holes in my wall when hung. Also I'm a tad indecisive and I like the flexibility a photo ledge offers - I've rearranged the frames three times this week already!

The finished product - I'm so happy with how it turned out!

To start, we (we = my dad) looked at the wall, found the studs, and marked out where the ledge would sit. There were also a lot of jokes made about how to "find a stud" at this point - I took notes. Based on the size of the wall we decided to install two ledges, one above the other, offset from each other (to avoid having to line them up perfectly). Each ledge is 5 feet long, 2 inches deep, with a lip to keep the frames in place. 

There are three studs in the wall where the ledge sits. To ensure it would be well supported, we were careful to ensure that each ledge was supported by all three studs, even with the offset.  Because I am horrible at explaining things of this nature I drew up a little diagram..


To mount the ledges, we set long screws halfway into the wall (so they still stuck out about half an inch) and cut the heads off with a hacksaw. We then drilled holes the same size as the screws into the backside of the shelf and slid it onto the screws, gently hammering it flush with the wall. As a result, you can't see any hardware and the shelves appear to be floating.


A few of my cheaper frames were a bit too meaty for the width of the ledge - simple to fix with a shopping trip on Boxing Day for replacements! I've mixed and matches black and white photos in simple black frames with some colour and I think the whole thing doesn't take itself too seriously.


This was the perfect project for a bit of an odd wall and it really ties everything together along the hallway. I still have some leftover framed photos but I'm sure I can find them homes somewhere around the house.

I got some wonderful gifts this Christmas but this is definitely one of my favorites!

Enjoy!